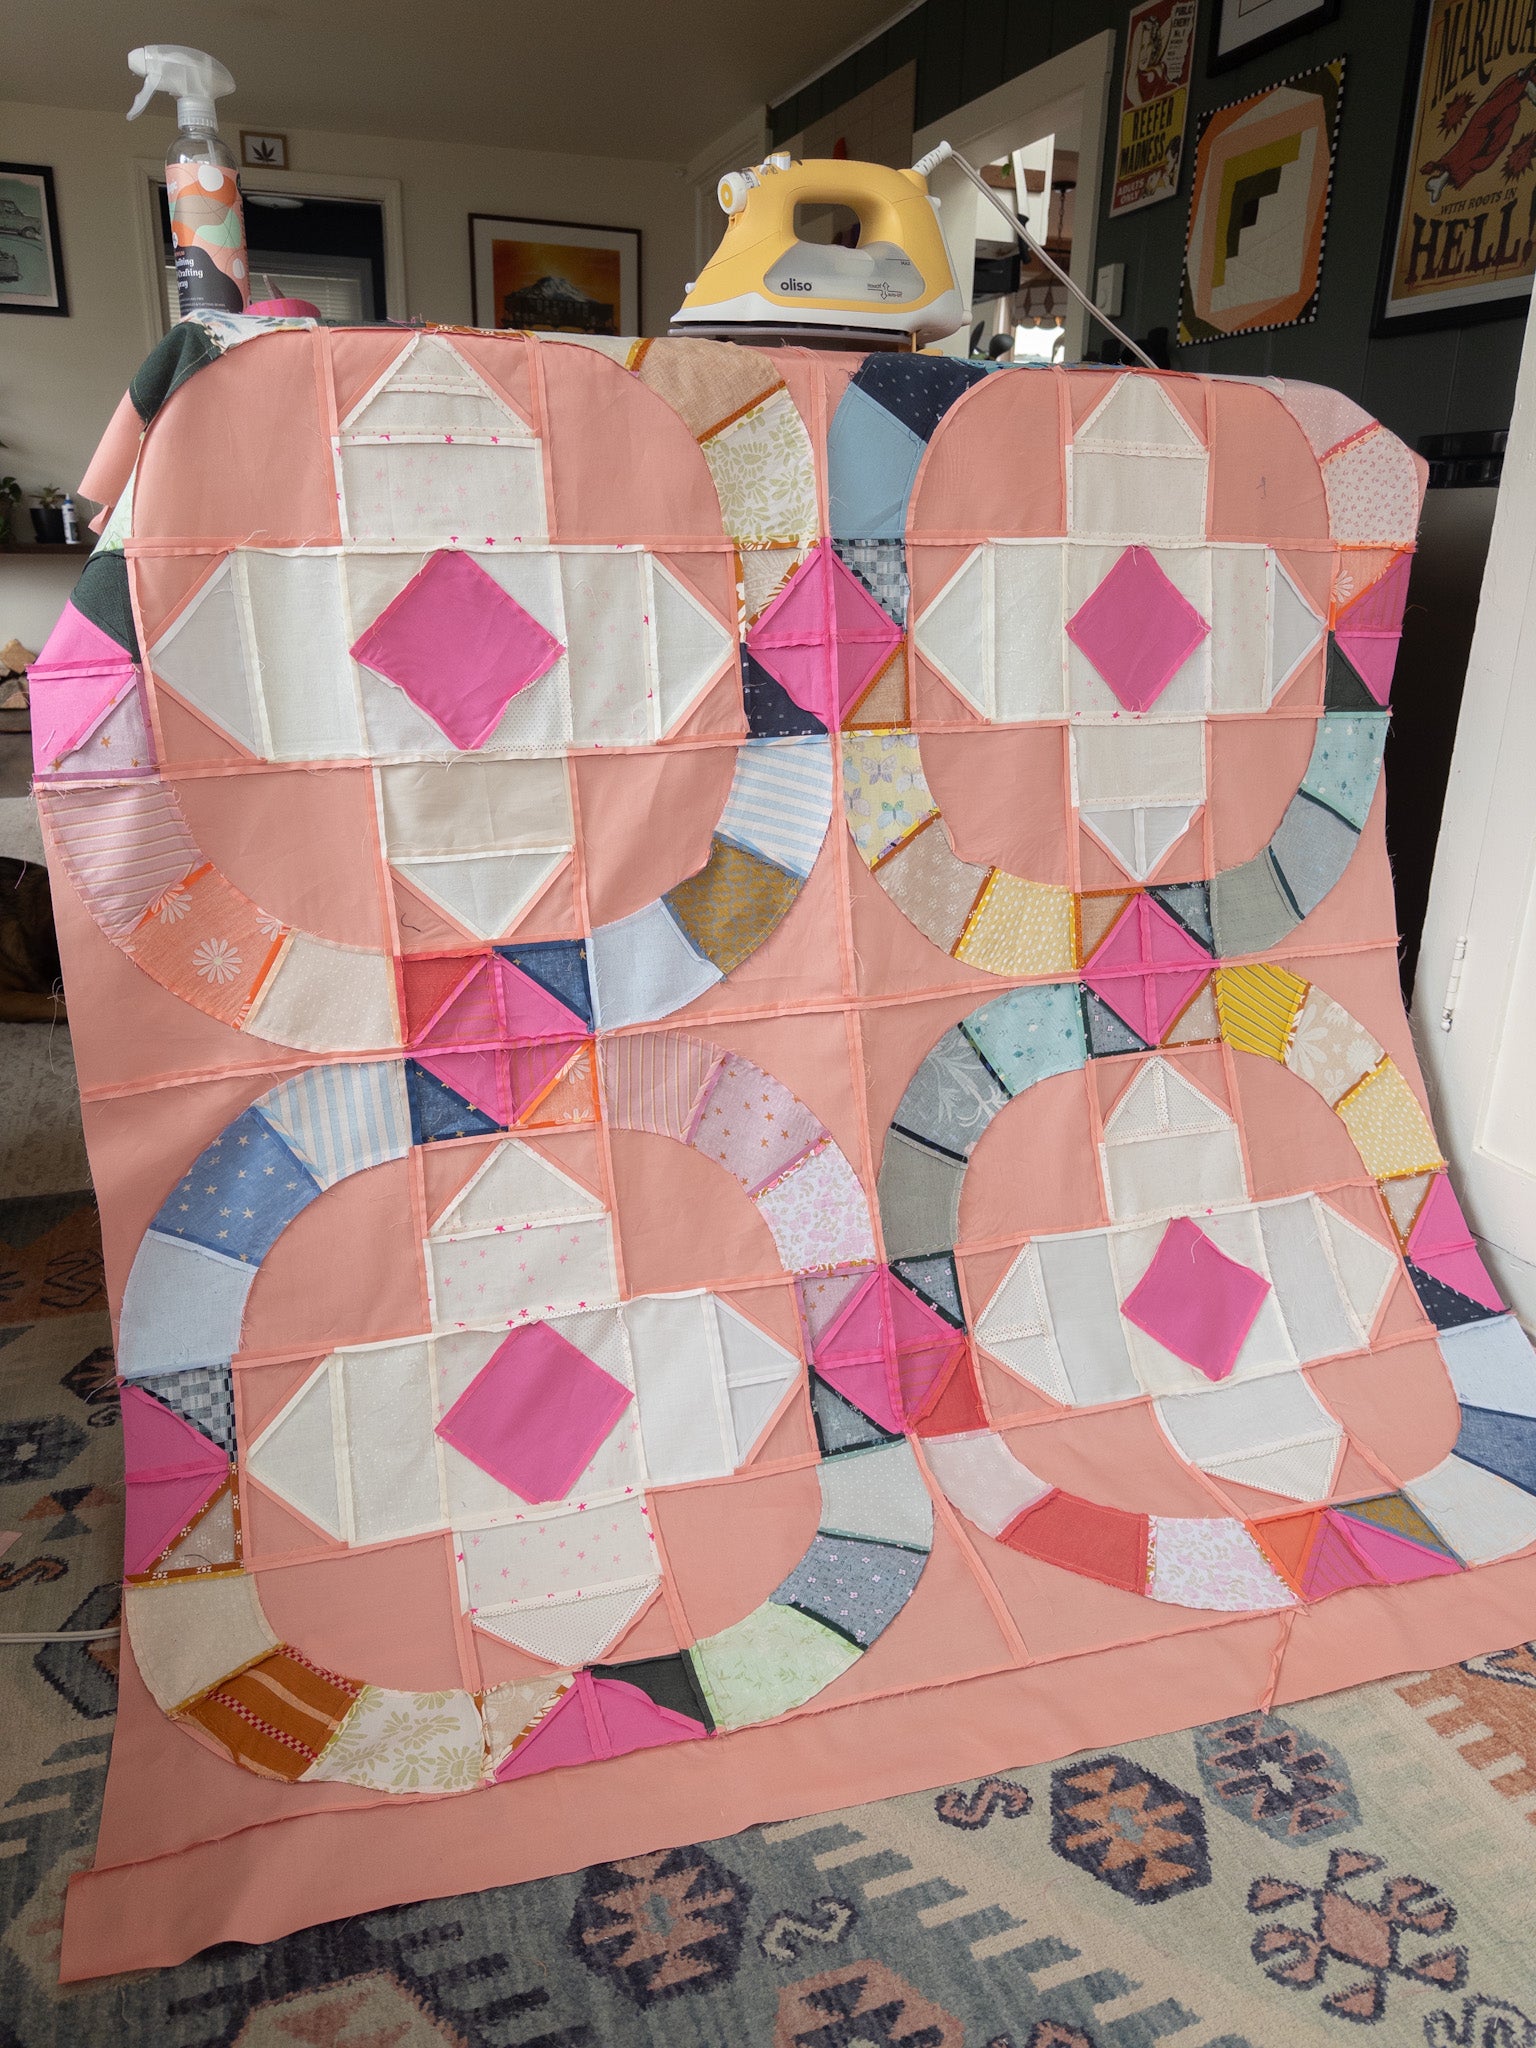

Hey everyone! I’m so thrilled to share the scrappy baby quilt I made using the Moonbeam pattern - it turned into the sweetest little stash-buster. If you’ve been hanging on to those fabric scraps, this is your sign to pull them out and let them shine.

A little backstory: when I first sat down to use my newly written Moonbeam pattern, I actually cut this scrappy baby quilt version first! I was supposed to be sewing my cover quilt, but there was something inspiring about my stash of scraps and the design of this quilt that made me dive right into this baby quilt. Spritzing each piece with my go-to Magic Premium Quilting and Crafting Spray made pressing those bias edges and tiny triangles an absolute dream - seams lay flat, points stayed sharp, and I had just enough body without any stiffness.
In Case You Missed It: I have a whole blog post about my favorite starch spray and other favorites on my blog! Check it out here.
Scrappy Moonbeam Baby Quilt Cutting Guide

The Moonbeam Quilt Pattern gives you a little guide on how to make a scrappy version, but I wanted to make sure I give you my exact list here in case you want to make a scrappy baby quilt just like me!
Please note: The letters used below are references to the pieces in the full Moonbeam quilt pattern. Please use the quilt pattern to locate the appropriate piece sizes [page 6] and printable templates [page 5].
-
Color Group 1 (Pinks)
- (4) B Templates
- (4) C Templates
- (4) D Templates
- (4) G Pieces
-
Color Group 2 (Blues)
- (4) B Templates
- (4) C Templates
- (4) D Templates
- (4) G Pieces
-
Color Group 3 (Yellows)
- (4) B Templates
- (4) C Templates
- (4) D Templates
- (4) G Pieces
-
Color Group 4 (Teals)
- (4) B Templates
- (4) C Templates
- (4) D Templates
- (4) G Pieces
-
Accent (Hot Pink)
- (4) H Pieces
- (16) G Pieces
-
Block Flowers (White)
- (8) J Pieces
- (4) F Pieces
- (16) K Pieces
-
Background (Peach)
- (16) A Templates
- (16) E Templates
- (16) G Pieces
Pro tip: If you can, try to make your C Templates and G Pieces in each color group darker and your B Templates and D templates in each color group lighter!
Why I Love Acrylic Templates

I used the acrylic Moonbeam templates from Cut Once Quilts for this scrappy version, and they were a total game-changer. Because the templates are clear and rigid, I could simply lay one on top of a scrap piece to check at a glance if it was big enough - no guessing or measuring. Plus, their sturdy nature meant I could stack several scraps and cut through all of them at once without worrying about slicing into a flimsy paper template. It made cutting multiples speedy and precise, so I spent less time trimming and more time stitching. If you can, you should totally try the acrylic templates out! No worries if you don't pick up a set - the Moonbeam quilt pattern comes with a link to print your own paper templates at home.
Piecing Your Scrappy Moonbeam Baby Quilt

Once your pieces are cut, follow the Moonbeam assembly steps on pages 8-14, swapping in your scrappy blocks where the pattern calls for solids. Each Moonbeam block will include each of the color groups as seen below.

Pro tip: Consider sorting your pieces before sewing so that you don't mix up any of your scraps! I love to use a design wall or a piece of batting tacked up on my wall to help me plan my pieces.
I can’t wait to see what you make - if you tackle a scrappy Moonbeam baby quilt, please share a photo and tag me on Instagram @toadandsew. You'll be ready to make your next scrappy baby quilt as soon as you're finished up with your Moonbeam Quilt! It's so much fun to make!